Physical Address
304 North Cardinal St.
Dorchester Center, MA 02124
Physical Address
304 North Cardinal St.
Dorchester Center, MA 02124

Looking to brighten up your camping experience? Wondering how to make a bucket light for camping? Well, you’re in luck! In this handy guide, we’ll show you step-by-step how to create your very own DIY bucket light. Say goodbye to fumbling in the dark and hello to a well-lit campsite!
With just a few simple materials and our easy-to-follow instructions, you’ll be illuminating your outdoor adventures in no time. So, get ready to shed some light on your next camping trip and let’s dive into the exciting world of bucket light crafting!
Main Summary: How to Make a Bucket Light for Camping
Create a DIY bucket light for camping: Fill a clean bucket with water, attach a headlamp facing inward, and secure it. The water diffuses light, providing ambient illumination for your campsite. Easy, budget-friendly outdoor lighting solution.
Camping is a wonderful outdoor activity that allows you to immerse yourself in nature. However, when the sun sets, proper lighting becomes essential to ensure a safe and enjoyable camping experience. In this guide, we will walk you through the process of creating a bucket light specifically designed for camping. With this DIY project, you can easily illuminate your campsite and enhance your camping adventures.
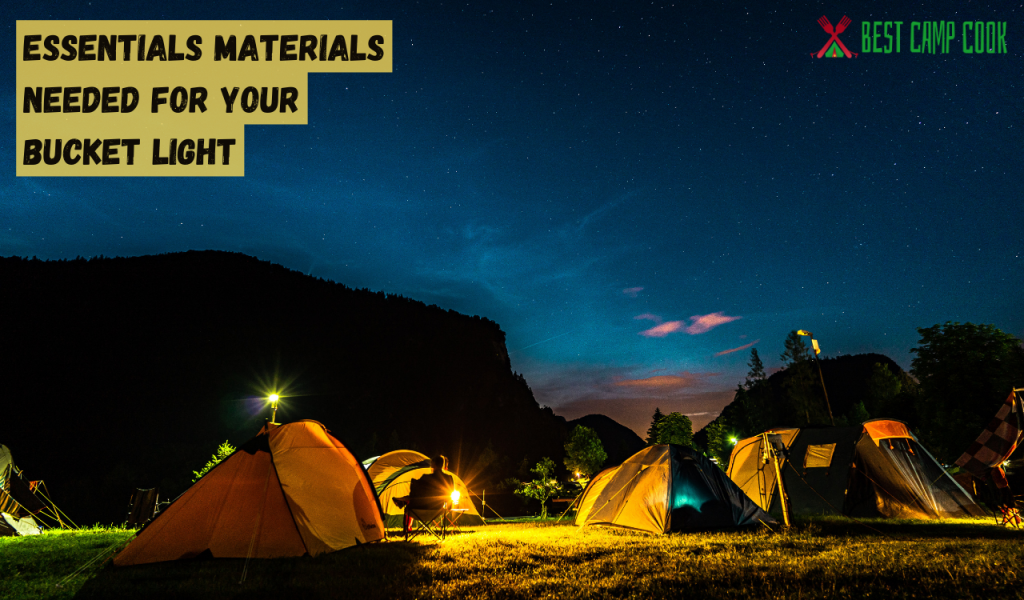
To create your own bucket light for camping, you’ll need a few essential materials. Gathering these items in advance will ensure a smooth and enjoyable DIY project. Here’s what you’ll need:
Now that you have all the necessary materials, it’s time to assemble your bucket light. Follow these step-by-step instructions to create a practical and efficient lighting solution for your camping adventures:
Start by cleaning the plastic bucket thoroughly to remove any dirt or debris. Ensure the bucket is dry before proceeding. This will provide a clean canvas for your project and prevent any unwanted particles from interfering with the final result.
Using your drill, create a series of holes around the upper rim of the bucket. These holes will allow the light to escape and illuminate the surroundings effectively. Make sure to space the holes evenly for uniform light distribution.
Take your LED light strip or portable LED light source and carefully place it along the inner circumference of the bucket, facing towards the drilled holes. Use electrical tape or cable ties to secure the lights in place. Ensure the lights are evenly distributed and cover the entire inner surface of the bucket.
Connect the battery pack or power source to the LED lights according to the manufacturer’s instructions. Double-check the connections to ensure they are secure. If using a battery pack, make sure it is fully charged or equipped with fresh batteries to avoid any interruptions during your camping trip.
Turn on the bucket light to test its functionality. Ensure that the light is evenly dispersed through the drilled holes and illuminates the surrounding area effectively. If needed, make any adjustments to the positioning of the LED lights or tighten the connections to achieve the desired outcome.
For added light reflection and dispersion, consider lining the inner surface of the bucket with reflective material or aluminum foil. This will help maximize the brightness and reach of your bucket light. Attach the reflective material securely using adhesive or tape.
If your bucket light comes with a lid, place it on top to protect the LED lights during transport and storage. The lid will also prevent any unwanted objects from falling inside the bucket and potentially damaging the lights.

When undertaking any DIY project, safety should always be a top priority. Here are some important considerations to keep in mind while making your bucket light for camping:
Making a bucket light for camping can significantly enhance your outdoor experience. With a little creativity and resourcefulness, you can transform a simple bucket into a versatile lighting solution. In this guide, we will explore the steps to create a bucket light and provide tips to optimize its performance, ensuring you have a well-lit campsite to enjoy.
Selecting the right bucket is crucial for your bucket light project. Opt for a sturdy and durable bucket that can withstand the rigors of outdoor use. Look for a size that suits your needs, considering the amount of light you want to emit and the portability of the bucket.
To create your bucket light, gather the following materials:
To further enhance the performance of your bucket light, consider the following tips:
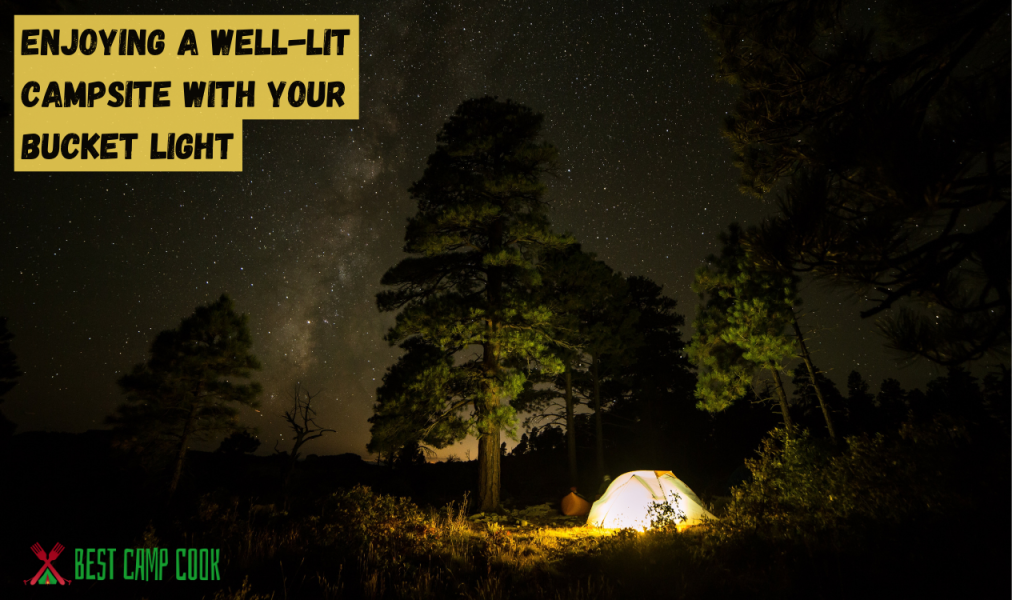
A well-lit campsite not only enhances safety but also creates a warm and inviting atmosphere for your camping adventures. With a DIY bucket light, you can illuminate your campsite and enjoy various activities even after the sun sets. Let’s explore the ways in which a well-placed bucket light can enhance your camping experience.
Arriving at a campsite after dusk can present challenges when it comes to setting up camp. However, with a bucket light, you can easily overcome this hurdle. Place your bucket light in a central location, illuminating the area where you plan to pitch your tent. This not only provides better visibility but also ensures you can secure your tent and set up camp efficiently, even in low-light conditions.
Camping is about creating memories and enjoying quality time with loved ones. A well-lit campsite sets the stage for cozy evenings filled with laughter, storytelling, and relaxation. Strategically place your bucket light near your seating area, casting a warm glow that fosters a sense of togetherness and intimacy. The gentle illumination creates a cozy ambiance, making your campsite feel like a home away from home.
Nighttime camping activities can be truly magical, and a bucket light can enhance the experience further. Whether you’re playing games, reading a book, or simply enjoying the starry sky, a properly positioned bucket light ensures you can engage in these activities with ease. Place the light near activity areas, such as the picnic table or the campfire, to ensure adequate visibility without compromising the enchanting darkness of the surrounding nature.
Safety is paramount when camping, especially during nighttime hours. A well-lit campsite minimizes the risk of accidents and allows you to navigate the area safely. Place bucket lights along pathways, near the entrance of your tent, and around potential hazards like tree roots or rocky terrain. This ensures that everyone can move around the campsite with confidence, reducing the likelihood of trips, falls, or other mishaps.
When the sun goes down, your outdoor activities don’t have to end. With a bucket light, you can extend your enjoyment of the outdoors well into the night. Whether you’re stargazing, wildlife watching, or simply savoring the tranquility of nature, your bucket light can provide the necessary illumination. Adjust the brightness of the light to create the desired ambiance and make the most of your camping adventures.

Camping is an exciting outdoor activity that allows you to connect with nature and create lasting memories. One essential aspect of a successful camping trip is proper lighting. With a DIY bucket light, you can illuminate your camping adventures and enjoy a well-lit campsite. Let’s explore how to create and utilize a DIY bucket light to enhance your camping experience.
Follow these steps to create your own DIY bucket light:
Line the interior walls of the bucket with the reflective material you have chosen. This helps maximize the light output by reflecting and diffusing the illumination, making it more efficient and effective.
Depending on your preference, either place the battery-operated LED lights inside the bucket or suspend a camping lantern from the handle. Ensure the light source is secure and positioned to provide the desired illumination.
If you are using battery-operated lights, insert the batteries and secure the battery compartment. If you opt for a camping lantern, ensure it is properly attached to the bucket’s handle or hanging mechanism.
Turn on the light source to test the illumination and make any necessary adjustments. Ensure the light is evenly distributed and adequately bright.
Once you have constructed your DIY bucket light, it’s time to put it to use and enhance your camping adventures:
Place the bucket light at the center of your campsite to provide overall illumination. This helps create a well-lit environment and makes it easier to navigate around the camping area.
Consider hanging multiple bucket lights from nearby trees or structures to create a captivating and well-lit campsite. This not only enhances visibility but also adds a touch of ambiance to your surroundings.
Adjust the brightness and color temperature of the light source to set the desired mood for different activities. Dim the lights for a cozy atmosphere during storytelling sessions, or increase the brightness for tasks like cooking or playing games.
If you anticipate encountering rainy or hot weather conditions, consider using waterproof LED lights and seal the bucket to protect the electrical components. This ensures that your DIY bucket light remains functional and safe even in wet or hot weather.
A light bucket refers to a DIY lighting solution that utilizes a plastic bucket as the main component. It typically involves attaching LED lights or battery-operated lights inside the bucket to create a portable and versatile light source for various applications, including camping.
To light up a campsite, you can use various methods. One option is to bring portable LED lanterns or flashlights to provide overall illumination.
Another option is to set up a campfire, which not only provides light but also warmth. Additionally, solar-powered outdoor lights or string lights can be hung around the campsite for a cozy ambiance.
A camping lamp is a type of portable lighting specifically designed for outdoor use during camping trips. It is typically lightweight, durable, and equipped with features to withstand outdoor conditions.
Camping lamps often utilize LED technology, which provides efficient and long-lasting illumination. They come in various sizes and designs, offering different brightness levels and lighting modes to suit individual preferences.
When lighting a tent without electricity, you have a few alternatives. Battery-powered lanterns or LED camping lights are convenient and provide ample illumination.
You can also use headlamps or clip-on lights for hands-free lighting inside the tent. Another option is to utilize glow sticks, which are lightweight and can be hung or placed strategically for a soft glow.
A camping bucket light is a DIY lighting solution where a plastic bucket is transformed into a portable light source. By attaching LED lights or battery-operated lights inside the bucket, you can create an affordable and versatile camping light. The bucket acts as a housing unit, dispersing the light and providing stability.
To create bucket lights, you will need a few supplies. Start by obtaining a clean, empty bucket with a handle. Place a battery-operated LED light or a string of battery-powered fairy lights inside the bucket. You can arrange the lights in a creative way or fill the bucket partially with water for a soothing reflection effect. Turn on the lights, and you have your DIY bucket lights ready to illuminate your space.
Tents do not provide adequate safety from lightning. Although the materials used in tents are non-conductive, they do not offer reliable protection against lightning strikes. It is crucial to prioritize personal safety during thunderstorms and seek appropriate shelter in a sturdy building or designated lightning-safe structure, rather than staying inside a tent.